Search

When you buy items from the Amazon links below, we get a small percentage of the sale. That helps us fund the site. And we like you a lot.

  • The Smitten Kitchen Cookbook
    The Smitten Kitchen Cookbook
    by Deb Perelman
  • Baked Elements: Our 10 Favorite Ingredients
    Baked Elements: Our 10 Favorite Ingredients
    by Matt Lewis, Renato Poliafito
  • Savory Sweet Life: 100 Simply Delicious Recipes for Every Family Occasion
    Savory Sweet Life: 100 Simply Delicious Recipes for Every Family Occasion
    by Alice Currah
  • The Pioneer Woman Cooks: Food from My Frontier
    The Pioneer Woman Cooks: Food from My Frontier
    by Ree Drummond
  • Bouchon Bakery
    Bouchon Bakery
    by Thomas Keller, Sebastien Rouxel

Entries in Baked (5)

Thursday
Jan202011

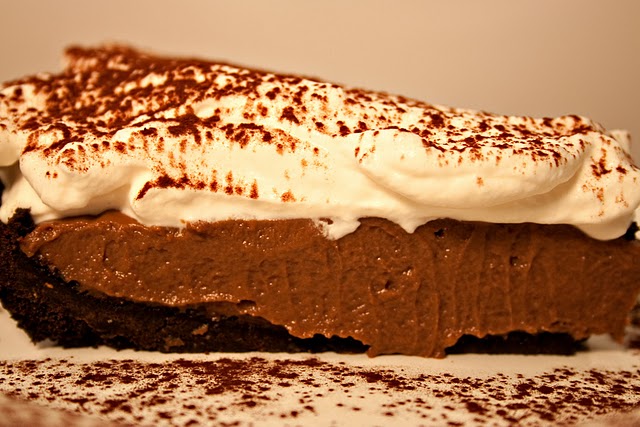
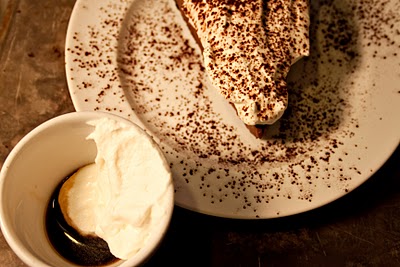
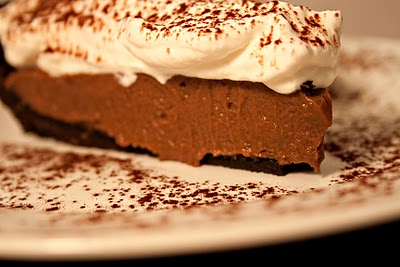
Chocolate Kahlua Pie via Matt Lewis and Chocolate Bar | Pie Month

This is the 7th entry in our Month of Pie. Pie Month is a celebration of things we love. Because life is hard, and there should always be more pie. Have a look at the other entries. Really. 
Pie #4 - Peanut Butter Cream Pie with Chocolate Whipped Cream
Pie #5 - Butterscotch Cream Pie with Gingersnap Crust and Cashew Brittle
Pie #6 - Banana Cream Pie with Chocolate Chip Cookie Crust
This pie saved us this week. 

Our lives are not hard, no matter what we say or think. But there comes a time in everyone’s life, maybe, where things aren’t quite sticking together the way they did, like the sides of a pullup diaper that’s been pulled up and down and sideways a few too many times. It’s just not holding its shape quite the same way it did or it should. We are sick (as we always are this time of year), and tired, and snow has canceled school for our son once already, and we’re bound to be stuck inside tomorrow when it snows again, and how can you be getting another cold when you didn’t get over your last one which was your third consecutive cold in a row, and for the love of all that is good and holy, could we just get off whatever messed up, coked up ride we are on and stop for a blasted second? And think. And be. And just stop.


And then there is pie. A perfect pie to be eaten on the couch. Or over the sink. And it has just enough booze in it to kick your mouth into gear, to get your spirit tapping its foot again, to say to your wife, “Oh, now this. THIS is good.” To not share it with the neighbors, because we need this pie all for ourselves. To go back for a second piece because you are eating your emotions, and your emotions are delicious. And you need more. Really.


This pie, this blessed pie, is from our hero, Matt Lewis, he of Baked fame. If you read our blog, you know we
stalk adore Matt. If you haven’t purchased Baked and Baked Explorations, your life has no meaning. But if you’re truly a regular reader of The Peche, you know our love for Matt started a long time ago with Chocolate Bar, his chocolate store and cookbook. It’s amazing when someone is creating food that is so perfect to begin, and you watch it grow and deepen and just get better. 

(Have you seen
Baked’s brownie mixes at Williams-Sonoma? Beautiful.)


So make this Chocolate Kahlua Pie from Chocolate Bar when life is spinning out of control, when it all seems too much, and when you need to catch a break and no break is in sight. This pie heals everything. And Matt has left extra room in the crust for an obscene amount of Kahlua Whipped Cream, because he knew you needed some extra love.


recipe | Chocolate Kahlua Pie via Matt Lewis and Chocolate Bar


Crust

  • 6 tablespoons unsalted butter
  • 2 teaspoons sugar
  • 1 ½ cups finely ground chocolate wafers (find them in the cookie aisle)

Turn the oven to 325. Pull out a 9-inch pie plate.


Melt the butter and then add in the sugar. Stir. Place the cookie crumbs into a medium bowl. Drizzle the butter over the crumbs until everything is evenly coated. Dump the butter and crumb mixture into the pie plate. Press the crumbs evenly into the bottom and up the sides. Bake around 10-12 minutes until it looks done. They’re dark chocolate, so use your best judgment. Pull it out and let it cool completely while you make the filling.


Chocolate Kahlua Filling

  • 3 ½ ounces bittersweet chocolate, chopped into very small pieces
  • 2 cups milk
  • ½ cup heavy cream
  • ¾ cup sugar (divided)
  • 3 tablespoons + 1 teaspoon cornstarch
  • 3 large egg yolks
  • 1 teaspoon vanilla extract
  • 3 tablespoons Kahlua
  • 2 tablespoons cocoa powder (for garnish)

Take the chopped chocolate and place in a medium mixing bowl. Put a fine-mesh strainer on top of the bowl. You’ll need it later.


Put the milk, cream, and ¼ cup of the sugar in a medium saucepan. Bring it to a boil.


Either sift the cornstarch into a small bowl or whisk it up to break up any clumps. Whisk in ½ cup of the sugar.


Whisk the egg yolks in a medium bowl until they start to lighten in color a bit. Add in the cornstarch mixture and whisk it (it’s going to be thick). Whisk in the vanilla.


Once the milk has boiled, stream ⅓ of it into the egg mixture and whisk like crazy. Whisk in another ⅓ of the milk. Then dump all of the eggy milk back into the pan with the remaining milk. Reduce the heat under the pan to medium and whisk until it starts to boil and thicken.  Once it starts to boil, whisk for three minutes and turn off the heat.


Pour the mixture through the fine-mesh strainer so that it falls over the chocolate. Whisk the mixture carefully until the chocolate melts and everything is evenly mixed together. Add the Kahlua and whisk. 


Let the mixture sit there for 10 minutes. Pour the Kahlua chocolate into the prepared crust. Cover with plastic wrap, placing the plastic directly on top of the chocolate. Chill for at least 4 hours.


Kahlua Whipped Cream

  • 2 cups heavy cream
  • ¼ confectioners sugar
  • 3 teaspoons Kahlua

Whip the cream until soft peaks form. Slowly add the sugar and Kahlua into the cream. Whip until the mixture has doubled in volume with soft peaks. Pour over the Kahlua chocolate. Top with sprinkled cocoa powder.

Thursday
Jan062011

Malted Crisp Tart (via Baked Explorations by Matt Lewis and Renato Poliafito) | Pie Month


This is the 2nd entry in our Month of Pie. Pie Month is a celebration of things we love. Because life is hard, and there should always be more pie. Have a look at the other entries. Really. 
Pie #1 - Lemon Cream Icebox Pie
Pie #3 - Apple Green-Chili Pie with Cheddar Crust and Walnut Streusel
Pie #4 -  Peanut Butter Cream Pie with Chocolate Cream Pie, Caramel & Deep Dark Fudge

One of my crowning achievements in life is teaching my father how to make Diplomat Cream. And caramelized crisp rice.
 
I made this tart with my dad. He and my mom drove the day after Christmas in the middle of what turned out to be a blizzard to get our house so that they could bring Christmas gifts to their grandkids (and see us, too, I suppose).
 
We made this is the last day of their visit. The kids were down for a nap (and so was Karen), and my mom was doing a little bit of shopping. It was just my dad and I.  I started making the tart, and he called from the other room if he could help. I initially said no because I wanted him to just enjoy himself andrest a bit before the long drive back home to Indiana.
 
Then I realized I wanted to cook again with my dad. I should take every chance I can to cook with both of my parents. So I asked him for help. Which is the best thing you can ask for from my dad. He’s at his best when he knows you need him. Dad doesn't mind playing sous chef at all, and he's a pretty good one, too. I gave them full reign over caramelizing the rice cereal (he had doubts about the Baked guys’ instructions to look for a little bit of smoke to know they were done, but there came the smoke, and the candied cereal came out perfectly).


He asked if anything else needed to be done. I almost sent him back to the couch, but there was Diplomat Cream to be made (capialized for emphasis). Diplomat Cream is essentially just stirring, and my motto is “Can you stir? Great, then you can make (insert one of the serveral dishes we’ve made on here that require a little stirring, like risotto or lemon curd).” Diplomat Cream is the same thing, just some stirring. So other than the crust, my dad made this tart.
 
The time involved actually making the tart is minimal. However there is a lot of resting and cooling time that you need to plan for. My advice? Start this tart early in the morning or the night before you actually need it. None of the steps are time-consuming, and it all comes together rather nicely.
 
Is a tart a pie? When we told people we were going to be doing the Month of Pie, the second tweet that I received was encouragement to remember that pies and tarts are all part of the same family. I like that family. And I love this tart. Other than the three pieces I let my dad, mom, and Karen eat, I ate the whole tart. I intended to share with the neighbors, but I ended up eating every single crumb, often standing over the kitchen sink while no one was looking. It’s a beautiful tart, and the looks match the taste. From the malt in the cream and chocolate to the Whoppers on top and in the filling, it’s flavor is bold and creamy. And a whole lot of happy.

A note about the crust...it is spectacular. Steal this crust. Make it for anything you possible can. It is so simple to make, and the brown sugar provides such a depth of flavor. Genius, Baked. Genius. (You really should buy their new book. It’s all spectacular.)

recipe | Malted Crisp Tart (via Baked Explorations by Matt Lewis and Renato Poliafito)

Ingredient list

For the brown sugar crust

  • 1 1/2 cups all-purpose flour
  • 1/4 teaspoon salt
  • 1 tablespoon malted milk powder
  • 10 tablespoons unsalted butter, cold, cut into half-inch pieces
  • 1/2 cup firmly packed light brown sugar
  • 1/2 teaspoon vanilla extract
For the caramelized crispies
  • 1/3 cup sugar
  • 2 cups crisp rice cereal
For the milk chocolate ganache
  • 8 ounces good-quality milk chocolate, coarsely chopped, (We used Scharffen Berger)
  • 2/3 cup heavy cream
  • 2 teaspoons malted milk powder
For the malted pastry cream
  • 1 1/4 c whole milk
  • 1/3 cup sugar
  • one large egg yolk
  • One large egg
  • 1 tablespoon plus 1 1/2 teaspoons cornstarch
  • 2 tablespoons malted milk powder
  • 2 tablespoons unsalted butter
  • 2 teaspoons vanilla extract
  • 5 ounces heavy cream
Additional items needed
  • One cup crushed malted milk balls
  • More malted milk balls to make it look pretty on top

To make the crust
Spray or butter the tart pan.  Pull out your food processor. Add all the ingredients for the crust in and pulse until you get crumbs.

Dump the mixture from the food processor into the tart pan. Press the crust into place.

Put the tart crust into the freezer for about 20 min.

Meanwhile turn on your oven to 350° Fahrenheit. Take the tart pan out of the freezer, put it on a baking sheet, and throw it  in the oven until golden brown between 20 and 30 min. Ours took 23 minutes. Pull it out of the oven and place on a wire rack to cool.

For the caramelized crisp rice
Note - If you have a Silpat or similar type of baking pad, you'll want to use it here. If you don't, the Baked guys recommend taking aluminum foil and spraying it  with vegetable oil.

Add 2 tablespoons of water and the sugar into a small saucepan. Place over low heat and get it boiling for 1 minute.

Add in the rice cereal and stir. Keep stirring until you start to see wisps of smoke rising up. Stir just a little bit more to make sure the caramelized sugar is all over the crispies and then pour them out onto the Silpat  or aluminum foil. Once cooled, break them into pieces if needed.

For the ganache
Chop up your milk chocolate and place in a medium-size bowl.

Whisk together the heavy cream and malt powder in a saucepan. Place it over low heat and bring to a simmer. Watch the cream carefully because it can boil in an instant and then it becomes terrible frothy mass. I speak from experience, having to start over. Pour it over the chocolate and let it sit for 2 minuntes. After the 2 minuntes. put your whisk in the middle of the mixture, turning around and around until you reach the edge of the bowl. It's a really beautiful process to watch the ganache come together.

To assemble the tart
Pour the ganache into the tart shell. Throw some crused malted milk balls on top along with one cup of the caramelized crisp rice. Slightly press milk balls and crispies into the ganache so that it all sticks together. Throw the tart in the refrigerator while you make the malted Diplomat Cream

Make the malted diplomat cream
Place a fine mesh sieve over a medium bowl.

In a medium-sized saucepan, bring the milk to a simmer and keep it warm.

In another medium bowl, whisk together the sugar, egg, egg yolk, cornstarch, and the malted milk powder until it becomes pale-ish yellow (about 1 minunte). Whisk in half of the warm milk into the egg mixture. Then pour the mixture back into the remaining milk in saucepan. Whisk the saucepan constantly until the whole thing thickens. Our mixture took about 8 minuntes. Yours may take less. Take it off the heat and throw in the butter and vanilla and whisk again until fully incorporated.

Then take the pastry cream and pour it into the sieve to remove any of the milk solids. Take a piece of plastic wrap and put it right on top of the pastry cream so you don't get any nasty thick skin on it. Put in the refrigerator for at least an hour until chilled.

Bring pastry cream after an hour out of the refrigerator and whisk it up until it looks like itself again.

In another bowl, whisk the heavy cream until you get soft peaks.Then fold it into the Diplomat Cream.

Take the tart out of the refrigerator and pour the Diplomat Cream on top of the milk chocolate. Garnish with some more malted milk balls if you have them (make it impressive) and then the rest the caramelized crispies on top. It then needs to refrigerate for at least another 30 minuntes. Sorry to make you wait.


Sunday
Jun132010

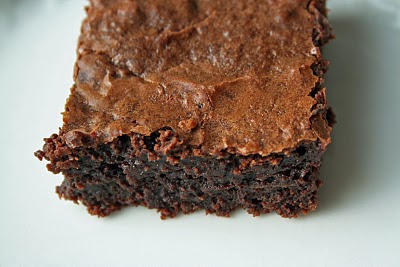
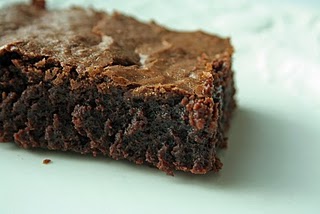
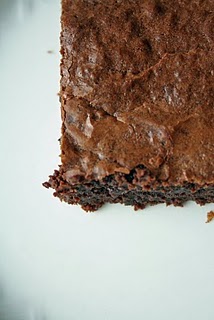
deep dark brownies from the Chocolate Bar cookbook

A few weeks ago, Matt Lewis tweeted something that got me excited. It was about a baker named Lesli in Milford, Connecticut, opening her own shop. Matt is one of the guys behind the cookbook Baked and the stores in Red Hook, Brooklyn and Charleston, SC. He also is respsonsible for, at least in part, peanut butter crispy bars, Tuscaloosa Tollhouse Pie, pumpkin whoopie pies and malted brewer's blondies, which we will post soon. He's got significant idol status in our house. 


But what was interesting to me was that he said Lesli, the baker setting up shop, was responsible for Baked's brownie recipe. The Baked cookbook catapulted Matt into sugar infamy, but we knew him from his first project, Chocolate Bar in NYC and its namesake cookbook. The cookbook has the very best chocolate cake recipe ever (yes, will post). And brownies that will make you cry. In a good way. Because we've made them so many times, I knew that a woman named Lesli was credited with the recipe. I took a chance and posted to Baked's Facebook page to see if it was the same Lesli. Jackpot.

These brownies are perfect. Completely perfect. Karen and I went on a brownie quest a few years back. Brownies matter to us like no other food category. They must be moist, deep in flavor, and neverever cakey. Cakey brownies are a horrible sin (Just call it cake. Don't pretend it's a brownie. It's not. It's cake). As soon as we made Lesli's brownies, the quest was over. We found it.


Lesli's Chocolate Bar brownies make you pay attention. You cannot devour them absentmindedly.

Everything else stops, and it's just you and the brownie. 

And then you finish. 

And then you have another. 

And you thank God you live in a world where the brownie has achieved perfection in your lifetime.

It was worth the wait.

Lesli is opening up her Scratch Baking shop in Milford, CT. I have two friends that live there, and one close enough she should just make the drive (Jen Thomson Caplet, I'm talking to you). She's at farmers' markets this summer. You must seek her out and eat whatever she makes. It will be good. She deserves riches. Follow her on Twitter and Facebook. Drive to Connecticut. 

Make her brownies. And thanks, Matt, for sharing her with us.


recipe | deep dark brownies
  • 3/4 c all-purpose flour
  • 1/4 t salt (we use Kosher)
  • 1 T cocoa powder
  • 1 stick unsalted butter
  • 3/4 t espresso powder
  • 5 oz semisweet chocolate
  • 3/4 c granulated sugar
  • 1/4 c light brown sugar
  • 3 large eggs
  • 1 t vanilla extract
  • 4 1/2 oz semisweet chocolate chips or chunks (you know how we do the chunks)
Preheat oven to 350 F. Butter an 8-inch square baking pan. Note: If you're using a dark metal pan, the recipe says to turn down the heat by 25 degrees.

Sift flour, salt, and cocoa powder together into a bowl. Give them a pep talk and let them know you'll be back soon.

Get a medium to large saucepan (size matters here, because all the ingredients are going in here eventually). Combine the butter and espresso powder and heat over low heat. Stir constantly until the butter melts. Add the chocolate, stirring until smooth, about 2 minutes.

Turn off the heat and add the sugars, stirring until combined.

Add eggs and vanilla. Stir until the graininess disappears.

Sprinkle the neglected flour mixture into the pan. Stir just until combined. Don't overstir or you'll make them tough. This is a moral failure. Then add the chocolate chunks.

Pour the batter into the baking pan. Smooth it out. Bake for 28-30 minutes. Don't overbake. Just bake it for 29 minutes and call it a day. Place them on a rack and let them cool as long as you can.

Tuesday
Apr202010

peanut butter crispy bars

If I had to be honest why I love this recipe, it's because hot sugar scares me.

Most cooking involves a minimum level of danger - open flames, knives that are duller than they should be (making it easier to cut yourself), forgetting I just chopped a habanero and touching my eye.

But hot sugar is kind of terrifying. I had a caramel sauce that foamed up and poured over the pan, burning my hand in the process. That super-saturated sugar water isn't forgiving to skin. 

But much like the Shetland pony that my brothers and I had growing up, which would run full gallop with us riding her without a saddle, only to stop on a dime and send us flying over her head...well, you can't let a few minor disasters in the kitchen stop you from trying to get it right.

So, get the pony ready, 'cuz we're going for a wild ride. It's another dessert from the Baked cookbook (did you get your copy yet?) - essentially a perfect peanut butter cup set on top of a sweet and crunchy foundation of crispy rice cereal. It's going to make you happy. And there's just a little bit of hot sugar involved. You'll be ok.

recipe | peanut butter crispy bars, from the Baked cookbook (buy. it. now.)

For the crispy crust 
1 3/4 cups crisped rice cereal
1/4 cup sugar
3 tablespoons light corn syrup
3 tablespoons unsalted butter, melted


For the milk chocolate peanut butter layer
5 ounces good-quality milk chocolate, coarsely chopped
1 cup creamy peanut butter (I used Skippy brand)
For the chocolate icing
3 ounces dark chocolate (60 to 72 percent cocoa), coarsely chopped
1/2 teaspoon light corn syrup
4 tablespoons unsalted butter


Make the crispy crust
Lightly coat an 8-inch square baking pan with nonstick cooking spray. 

Put the cereal in a large bowl and set aside.


Pour 1/4 cup water into a small saucepan. Gently add the sugar and corn syrup (do not let any sugar or syrup get on the sides of the pan. It will burn easily if you do, and you don't want that) and use a small wooden spoon to stir the mixture until just combined. Put a candy thermometer in the saucepan. Cook over medium-high heat and bring to a boil; cook until the mixture reaches the soft ball stage, 235 degrees F. It took me longer than I expected. Be patient.


Remove from the heat, stir in the butter, and pour the mixture over the cereal. Working quickly, stir until the cereal is thoroughly coated, then pour it into the prepared pan. Using your hands, press the mixture into the bottom of the pan (do not press up the sides). Let the crust cool to room temperature while you make the next layer.


Make the milk chocolate peanut butter layer
In a large nonreactive metal bowl, stir together the chocolate and the peanut butter. Set the bowl over a saucepan of simmering water and cook, stirring with a rubber spatula, until the mixture is smooth. Remove the bowl from the pan and stir for about 30 seconds to cool slightly. Pour the mixture over the cooled crust. Put the pan in the refridgerator for 1 hour, or until the top layer hardens.


Make the chocolate top
In a large nonreactive metal bowl, combine the chocolate, corn syrup, and butter. Set the bowl over a saucepan of simmering water and cook, stirring with a rubber spatula, until the mixture is completely smooth. Remove the bowl from the pan and stir for 30 seconds to cool slightly. Pour the mixture over the chilled milk chocolate peanut butter layer and spread (actually, I found it easier to just roll it around until it coated smoothly, avoiding the risk of picking up any of the peanut butter layer with it) into an even layer. Put the pan into the refrigerator for 1 hour, or until the topping hardens.


Cut into nine-ish squares and serve. The bars can be stored in the refrigerator, covered tightly, for up to four days. But you will want to eat them all at once. Just make another batch tomorrow. No one will know.

Tuesday
Apr132010

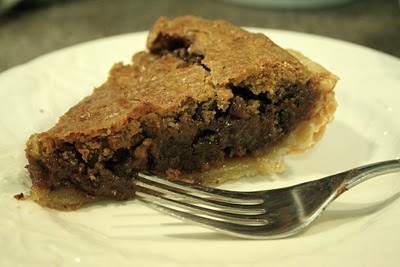
tuscaloosa tollhouse pie (from the Baked cookbook)

Let's cut to the chase.

Make this pie. Now.

If you were planning to go to bed... Or say loving things to someone... Or do your job... Put. It. On. Hold. You can sleep/love/work later.

You need this pie.

You know how much we love Alice's Chocolate Chunk Cookies? Right. This is a pie full of oozing chocolate cookie.

And it has whiskey in it. So that should pretty much sell it.

The recipe comes from the Baked cookbook. The recipes are the ones used in their bakery. We love that book. Our friend, Tod, bought it after we made him pumpkin whoopie pies from it. He loved them that much. I think he had a desire to have whoopie pies on demand. Now he can't stop baking from it. It's like The Red Shoes but with flour-based goodness.

Karen and I took the kids to Brooklyn this weekend to see the cherry blossoms. We stopped at the Baked shop in Red Hook before we saw the flowers. The kids ate monster cookies. I ate scones. Karen ate brownies. Pretty much the best breakfast ever. When we got home, we started looking at Red Hook real estate. That's how much we love them.

The recipe follows. Fair warning - we will feature a couple of more recipes from Baked in the next few weeks. I'd suggest you buy a copy and bake along.


baked’s tuscaloosa tollhouse pie
  • Pie dough (you live a life full of choices. Pie crust is another one. Decide for yourself what crust you want to make. I'm not the boss of you.)
  • 1/2 cup all-purpose flour
  • 1/2 cup granulated sugar
  • 1/2 cup packed brown sugar
  • 2 eggs
  • 3/4 cup (1 1/2 sticks) unsalted butter, softened and cubed
  • 1 T whiskey (or not)
  • 3/4 cup walnuts, toasted and chopped fine (You can buy them chopped fine. Move on.)
  • 8 oz. semisweet chocolate chips. Or chop some chunks.

Do your pie crust. You know I have issues making them. Karen does not. Do what makes you happy. Once you've got it in the pan, freeze it while you make the filling.

Get the oven to 350 degrees F.

Whisk the flour and sugars together. Put them in the corner and give them a pep talk. They're going to make something awesome.

With a whisk attachment, beat eggs on high speed until foamy. Maybe three minutes. Eject the whisk. Put the paddle attachment on the mixer. Turn it on low. Slowly, add the flour and sugars. Mixer on high for two minutes. Scrape down and throw in the butter. Beat on high until combined. Add the whiskey if you want it. Beat on high for one minute.

Use a spatula and fold in the walnuts and half of the chocolate. Note that you're not putting in all the chocolate. Yet.
Pour the filling into the pie shell. Throw on the rest of the chocolate. Bake for 25 minutes. The edges are going to be done before the filling, so fold up some foil so it looks like a belt, and then cover the edges of crust. You want to shield the crust from the heat, but don't shield the filling. Bake for another 25 minutes or so. It's done when a knife stuck in it comes out clean.

Cool completely on a rack (who are we kidding? You should wait a couple of minutes and then dig in) before serving. Reheat for a few seconds in the microwave if it cools completely before you get a chance to devour it.


Recipe from Baked: New Frontiers in Baking (Stewart, Tabori & Chang)