Search

When you buy items from the Amazon links below, we get a small percentage of the sale. That helps us fund the site. And we like you a lot.

  • The Smitten Kitchen Cookbook
    The Smitten Kitchen Cookbook
    by Deb Perelman
  • Baked Elements: Our 10 Favorite Ingredients
    Baked Elements: Our 10 Favorite Ingredients
    by Matt Lewis, Renato Poliafito
  • Savory Sweet Life: 100 Simply Delicious Recipes for Every Family Occasion
    Savory Sweet Life: 100 Simply Delicious Recipes for Every Family Occasion
    by Alice Currah
  • The Pioneer Woman Cooks: Food from My Frontier
    The Pioneer Woman Cooks: Food from My Frontier
    by Ree Drummond
  • Bouchon Bakery
    Bouchon Bakery
    by Thomas Keller, Sebastien Rouxel

Entries in Pie Month (13)

Sunday
Jan232011

Bacon and Egg Pizza Pie (via the Big Sur Bakery Cookbook) | Pie Month

This is the 8th entry in our Month of Pie. Pie Month is a celebration of things we love. Because life is hard, and there should always be more pie. Have a look at the other entries. Really. 
Pie #4 - Peanut Butter Cream Pie with Chocolate Whipped Cream
Pie #5 - Butterscotch Cream Pie with Gingersnap Crust and Cashew Brittle
Pie #6 - Banana Cream Pie with Chocolate Chip Cookie Crust
Pie #7 - Chocolate Kahlua Pie
Is pizza pie? 

We struggled with answering that question for our Month of Pie. Could a pizza really take one of our 15 slots for pie? Our decision came down to two things:

  1. What would Dean Martin say (WWDMS)? Given that it is amore when the moon hits your eyes, we felt fairly comfortable with his response.
  2. How did the pizza taste? In a word, “incredible.”
We've already told you about our love of the Big Sur Bakery Cookbook. So we turned to it when we stated on our Month of Pie, looking for inspiration. And while there are some sweet little pies in there (Chantrelle, Heirloom Tomato, Pork Belly with Barbecue Sauce and Sweet Corn), we were drawn to their Breakfast Pizza. In the middle of a flood of cream pies, this pizza called to us loudly.


Here’s what so special about the pizza...you crack eggs right on to top. The idea of three happy yolks standing at attention was too much to pass up (though I’m not sure I would have even thought of eating this five years ago). Also, the fresh tasting onion flavor coming from the scallions, chives, and shallots playing off the strong bacon and cheese flavors promised complete breakfast satisfaction.


We’re not big breakfast casserole people. They’re a favorite of many in our families, but this pizza is our answer to those casseroles. The ingredients are nearly the same, but the ratio of cheese to egg to bread to bacon is more to our liking.


You can make your own pizza dough (use your favorite), or you can purchase your dough from the grocery, or this being New Jersey, from a local pizza place. We made our own, but if we were in a hurry, I would have no problem using purchased dough.
This pizza can be thrown together in minutes in the morning. Within 30 minutes (10 for prep, 12 to cook), you’ve got an incredible pizza pie that balances nicely with that leftover chocolate pie you made the night before.


recipe | Breakfast Pizza via the Big Sur Bakery Cookbook


Note -  if you have a pizza stone, please use it. Heat it up in the oven and use a wooden peel to get the pizza on to the stone. We don’t have a pizza stone, so we’ve noted our approach below. 
  • 3 bacon strips or extra for snacking
  • Pizza dough for one pizza
  • ¼ cup grated Parmesan 
  • 1 cup grated fresh mozzarella 
  • 3 eggs
  • Kosher salt
  • Pepper
  • 2 tablespoons basil
  • 2 tablespoons minced flat parsley
  • 2 tablespoons minced chives
  • 2 scallions (white and green parts), sliced thinly
  • 1 shallot, minced
Cook your bacon until crisp (we roast ours in the oven on a pan, 425 F for around 15 minutes for thicker bacon).  Place on paper towel to dry.

Shape your dough on lightly floured large cookie sheet, using your fingers to stretch the dough to the shape you want. We’re comfortable with irregularly-shaped pizzas. If you can make it circular, you are a better person than we are.

Sprinkle the Parmesan, mozzarella, and broken up bacon. Season with salt and pepper. 

Place pizza in the oven for four minutes.


Meanwhile, crack open the eggs into three separate small bowls. You’re doing this to move quickly when you place the eggs on top of the pizza. You don’t want to fumble around with a hot oven.


When the four minutes are up, slide out the oven rack with the pizza pan on it. Place the eggs on top of the pizza, evenly spaced. You might need to dig into the cheese a bit to make a nest for each egg. Return the pizza to the oven and bake for 4-8 more minutes until the eggs are done to your liking.


When the eggs are done (we like them loose and a little runny) and the crust is golden, pull out the pizza, sprinkle with parsley, chives, scallions, and shallots. Slice and serve immediately.

Thursday
Jan202011

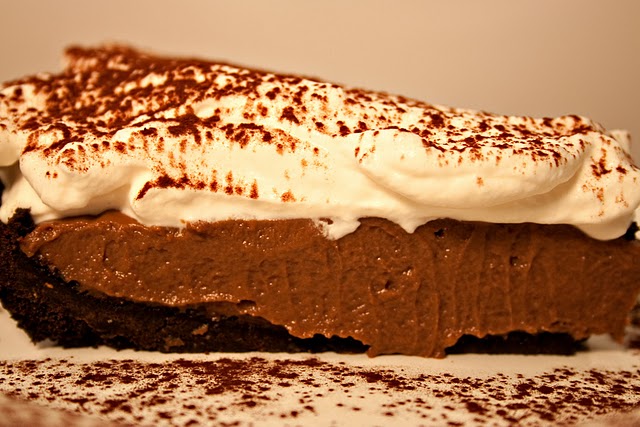
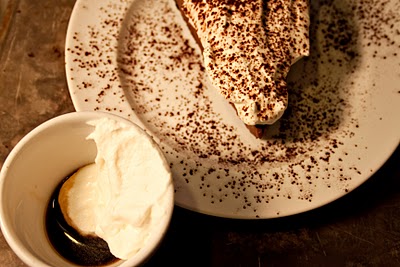
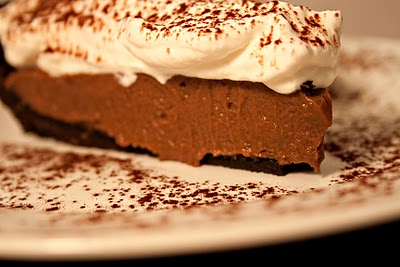
Chocolate Kahlua Pie via Matt Lewis and Chocolate Bar | Pie Month

This is the 7th entry in our Month of Pie. Pie Month is a celebration of things we love. Because life is hard, and there should always be more pie. Have a look at the other entries. Really. 
Pie #4 - Peanut Butter Cream Pie with Chocolate Whipped Cream
Pie #5 - Butterscotch Cream Pie with Gingersnap Crust and Cashew Brittle
Pie #6 - Banana Cream Pie with Chocolate Chip Cookie Crust
This pie saved us this week. 

Our lives are not hard, no matter what we say or think. But there comes a time in everyone’s life, maybe, where things aren’t quite sticking together the way they did, like the sides of a pullup diaper that’s been pulled up and down and sideways a few too many times. It’s just not holding its shape quite the same way it did or it should. We are sick (as we always are this time of year), and tired, and snow has canceled school for our son once already, and we’re bound to be stuck inside tomorrow when it snows again, and how can you be getting another cold when you didn’t get over your last one which was your third consecutive cold in a row, and for the love of all that is good and holy, could we just get off whatever messed up, coked up ride we are on and stop for a blasted second? And think. And be. And just stop.


And then there is pie. A perfect pie to be eaten on the couch. Or over the sink. And it has just enough booze in it to kick your mouth into gear, to get your spirit tapping its foot again, to say to your wife, “Oh, now this. THIS is good.” To not share it with the neighbors, because we need this pie all for ourselves. To go back for a second piece because you are eating your emotions, and your emotions are delicious. And you need more. Really.


This pie, this blessed pie, is from our hero, Matt Lewis, he of Baked fame. If you read our blog, you know we
stalk adore Matt. If you haven’t purchased Baked and Baked Explorations, your life has no meaning. But if you’re truly a regular reader of The Peche, you know our love for Matt started a long time ago with Chocolate Bar, his chocolate store and cookbook. It’s amazing when someone is creating food that is so perfect to begin, and you watch it grow and deepen and just get better. 

(Have you seen
Baked’s brownie mixes at Williams-Sonoma? Beautiful.)


So make this Chocolate Kahlua Pie from Chocolate Bar when life is spinning out of control, when it all seems too much, and when you need to catch a break and no break is in sight. This pie heals everything. And Matt has left extra room in the crust for an obscene amount of Kahlua Whipped Cream, because he knew you needed some extra love.


recipe | Chocolate Kahlua Pie via Matt Lewis and Chocolate Bar


Crust

  • 6 tablespoons unsalted butter
  • 2 teaspoons sugar
  • 1 ½ cups finely ground chocolate wafers (find them in the cookie aisle)

Turn the oven to 325. Pull out a 9-inch pie plate.


Melt the butter and then add in the sugar. Stir. Place the cookie crumbs into a medium bowl. Drizzle the butter over the crumbs until everything is evenly coated. Dump the butter and crumb mixture into the pie plate. Press the crumbs evenly into the bottom and up the sides. Bake around 10-12 minutes until it looks done. They’re dark chocolate, so use your best judgment. Pull it out and let it cool completely while you make the filling.


Chocolate Kahlua Filling

  • 3 ½ ounces bittersweet chocolate, chopped into very small pieces
  • 2 cups milk
  • ½ cup heavy cream
  • ¾ cup sugar (divided)
  • 3 tablespoons + 1 teaspoon cornstarch
  • 3 large egg yolks
  • 1 teaspoon vanilla extract
  • 3 tablespoons Kahlua
  • 2 tablespoons cocoa powder (for garnish)

Take the chopped chocolate and place in a medium mixing bowl. Put a fine-mesh strainer on top of the bowl. You’ll need it later.


Put the milk, cream, and ¼ cup of the sugar in a medium saucepan. Bring it to a boil.


Either sift the cornstarch into a small bowl or whisk it up to break up any clumps. Whisk in ½ cup of the sugar.


Whisk the egg yolks in a medium bowl until they start to lighten in color a bit. Add in the cornstarch mixture and whisk it (it’s going to be thick). Whisk in the vanilla.


Once the milk has boiled, stream ⅓ of it into the egg mixture and whisk like crazy. Whisk in another ⅓ of the milk. Then dump all of the eggy milk back into the pan with the remaining milk. Reduce the heat under the pan to medium and whisk until it starts to boil and thicken.  Once it starts to boil, whisk for three minutes and turn off the heat.


Pour the mixture through the fine-mesh strainer so that it falls over the chocolate. Whisk the mixture carefully until the chocolate melts and everything is evenly mixed together. Add the Kahlua and whisk. 


Let the mixture sit there for 10 minutes. Pour the Kahlua chocolate into the prepared crust. Cover with plastic wrap, placing the plastic directly on top of the chocolate. Chill for at least 4 hours.


Kahlua Whipped Cream

  • 2 cups heavy cream
  • ¼ confectioners sugar
  • 3 teaspoons Kahlua

Whip the cream until soft peaks form. Slowly add the sugar and Kahlua into the cream. Whip until the mixture has doubled in volume with soft peaks. Pour over the Kahlua chocolate. Top with sprinkled cocoa powder.

Tuesday
Jan182011

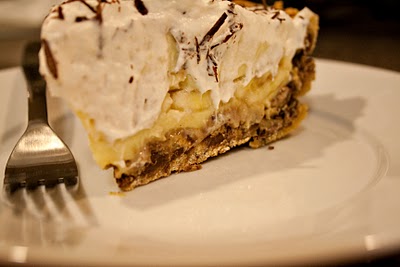
Banana Cream Pie with Chocolate-Chip-Cookie Crust (via epicurious + savory sweet life) | Pie Month

This is the 6th entry in our Month of Pie. Pie Month is a celebration of things we love. Because life is hard, and there should always be more pie. Have a look at the other entries. Really. 
Pie #4 - Peanut Butter Cream Pie with Chocolate Whipped Cream


I’m live blogging while I taste this pie. Let's taste this pie together, kids.


It’s the chocolate curls that get me first. A vegetable peeler taken to a bar of 70% Bittersweet Scharffen Berger. I pinch a bit off the top to taste. Easy, fast, pretty, and barely sweet.


The knife goes easy into the pie. No resistance. Cutting through air, until it hits the crust, giving way to the blade as I swipe it from the center to the rim.


Another cut.


And then it’s time to contemplate the crust. Chocolate chip cookie dough peeks past the whipped cream. This is going to be great. I used our favorite chocolate chip cookie recipe from Alice at Savory Sweet Life, foregoing the usual chocolate chunks in favor of semi-sweet chips. The recipe calls for prepared cookie dough. You can do that, but we use Alice’s. These are the perfect cookies, making the perfect pie crust.


A fork goes in, swiping off the point. Creamy, banana, whipped cream, a hit of chocolate from on top, and a crunch+chew of the cookie crust chaser. A linger, barely, of rum. 


Forget the fork. 


This is pie to hold, to be caress, to love.


The other half of this pie went to the neighbors. Share the pie love.


recipe | Banana Cream Pie with Chocolate-Chip-Cookie Crust via epicurious.com
recipe | Chocolate Chunk Cookies via Savory Sweet Life

Saturday
Jan152011

Butterscotch Cream Pie with Gingersnap Crust and Cashew Brittle (via Karen DeMasco) | Pie Month

This is the 5th entry in our Month of Pie. Pie Month is a celebration of things we love. Because life is hard, and there should always be more pie. Have a look at the other entries. Really. 
I have always hated butterscotch pie.


The hatred began at an early age, going to school fundraisers that involved deep frying some sort of meat...breaded cod or breaded pork tenderloin smashed to paper-thin thickness which is pure brilliance. Throw that crispy pork on a bun, add some mustard and extra pickle, and I was very happy.


But in my mind I still see the dessert tables lined against one wall in the school cafeteria, littered with small white styrofoam plates, all topped with butterscotch pudding pies. The chocolate, apple, and cherry pies were long gone, taken by other fundraiser attendees whose parents let them get their dessert before eating their fried meat.


All that were left were the slices of butterscotch pudding pie. Every single time.


For me, butterscotch pudding pies are Pies of Sad, filled with sickly brown tears of disappointment and missed opportunity. 


The flavors from the instant pudding and/or butterscotch chips don’t ring true to me. It’s like they’re trying too hard, amping up their flavors to an aggressive level, trying desperately to convince you that what you’re eating tastes better than it actually does. Throw in some frozen whipped topping with the pudding, a the desperateness ratchets up even higher.

I’m not against using shortcuts in the kitchen. It just needs to taste great. And butterscotch pie always missed the mark by a mile for me.


Until today.

Leave it to Karen DeMasco at Craft in NYC and author of The Craft of Baking
. Chef DeMasco never disappoints, and when we read her recipe for Butterscotch Cream Pie with Gingersnap Crust, we figured that if anyone could convert me to butterscotch, she was the one.


Here’s the thing about butterscotch...it’s not aggressive. It’s sublime. DeMasco’s pie is full of caramel-y depth, smoothed out by dairy and infused vanilla bean. The candy crunch of the brown sugar gingersnap crust plays perfectly with the smoothness sitting on top. Add in some unsweetened whipped cream for garnish, and you’ve got something wonderful. But DeMasco wants this pie to be extraordinary and suggests the addition of Honeycomb Brittle (just an extra puffy brittle that looks like honeycomb inside). But we went with another of her recipes for garnish. And for us, the cashew brittle was what took this pie over the edge into pure awesome. Sweet, salty, with the toothsomeness that makes you want to eat a bucket of the brittle. Fortunately, we were left with extra brittle to keep us happy for a while.


Make this pie, especially if you never especially liked butterscotch pudding pie. It’s time to discover what this pie was supposed to taste like.


recipe | Butterscotch Cream Pie with Gingersnap Crust and Cashew Brittle (via Karen DeMasco's The Craft of Baking)


Gingersnap Crust 
note - Chef DeMasco makes her own gingersnap cookies. We did not. It was still good.

  • 1 ¾ cups gingersnap cookie crumbs (blitz the purchased cookies in a food processor until you get small crumbs)
  • ¼ cup dark brown sugar
  • 1 tablespoon unbleached all-purpose flour
  • ½ teaspoon kosher salt
  • 4 tablespoons unsalted butter, melted

Turn your oven on to 350 degrees Fahrenheit


Mix together the cookie crumbs, sugar, flour, and salt in a bowl. Add the melted butter and stir until evenly coated. If the mixture isn’t sticking together when you press it against the side of the bowl, stir in one tablespoon of water. It’ll stick then.


Dump the mixture into your 9-inch pie plate and press the crust into place. Cover the sides and the bottom. Place the pie plate into the freezer for 10 minutes. Take it out of the freezer and bake for 10 minutes. Take the crust out of the oven and let cool completely.


Butterscotch Cream Filling

  • ¾ cup sugar (divided)
  • 5 large egg yolks
  • ¼ cup cornstarch
  • ½ vanilla bean, split open and seeds scraped out (but you want to use both the bean and the seeds)
  • 1 cup heavy cream
  • 2 cups whole milk
  • 1/2 teaspoon kosher salt
  • 2 tablespoons unsalted butter, diced
  • 1 1/2 cups of heavy cream (to whisk and use as garnish)

Grab a bowl. Doesn't need to be big. Add in ¼ cup of the sugar, the egg yolks, and the cornstarch. Whisk until the mixture lightens and looks like our kitchen wall color. Which is to say a light butter yellow.


In a medium saucepan, add in ½ cup sugar, ¼ cup water, and all of the vanilla bean and seeds. Stir it up to get the water to moisten all of the sugar. Don’t be disturbed by the hunks of vanilla bean. We’ll strain them out later. Turn the heat on high. Be scared a little. Set the timer to 8 minutes and don’t touch it. Maybe a slight move of the pan if you see part of the mixture getting darker faster than the rest. But no stirring. When the caramel becomes a golden color (not brown), turn off the heat. This was exactly at the 8 minute mark for us. Slowly whisk in the cream. Be careful, the sucker’s gonna foam up. Then stir in the milk. Breathe.


Turn the heat back on under the caramel. Bring it to a boil and then turn it off.


Grab that bowl with the egg mixture you whisked earlier. Get it close to the stove.


In a slow, steady stream, whisk ⅓ of the caramel into the eggy bowl. Slowly. Thin stream. Otherwise you’ll get scambled eggs. Once you’ve added enough of the caramel, put the caramel back on the stove. Then add the egg+caramel mixture into the caramel saucepan. 


Turn the heat to medium-low under the caramel saucepan. Whisk. Don’t stop whisking. Bring it to a boil and keep whisking for 8 minutes. Again with the 8 minutes. Remove the pan from the burner and whisk in the butter and salt. Nice work. Really.


Get a smallish bowl and place a fine-mesh sieve over it. Pour the caramel custard through the sieve. See, there’s that vanilla bean. Take the newly strained caramel custard and pour it into the gingersnap pie crust. Let it cool completely while you make the cashew brittle.


Cashew Brittle

  • A silicone baking pad or nonstick cooking spray
  • 2 cups sugar
  • 8 tablespoons unsalted butter
  • ½ cup light corn syrup
  • ½ teaspoon baking soda
  • 1 ½ teaspoons kosher salt
  • 1 ½ cups salted roasted cashews

If you have a silicone baking pad, use it on a baking sheet. If not, spray a baking sheet with nonstick cooking spray. Keep it handy.


In a large saucepan (seriously, large, not medium), add in the butter, sugar, corn syrup, and 1/2 cup water. Stir it gently so the sugar is wet. Don’t get all sloppy while stirring. Gentle. Get a long wooden spoon ready for later.


Turn on the burner to high under the saucepan. If you believe in a higher power, ask for assistance. Cook for about 10 minutes without stirring. You want a dark caramel color. We went dark with ours and loved it. Turn off the heat.

Now, let’s be careful. Add in the baking soda and whisk. Add in the salt and keep whisking. The mixture is going to rise. Whisk. Quickly add in the cashews and stir with the wooden spoon.

Pour the mixture out on to your baking sheet. Let cool completey. We put ours out in the snow. Once cool, break it up into small pieces. Use a kitchen mallet. Or the butt of the handle of your chef’s knife.


To assemble the pie
Whip the heavy cream until you get soft peaks. Top the pie. Sprinkle on smallish bits of the cashew brittle. You might want to add a piece or two of larger brittle chunks to each person’s plate when you serve. 

Monday
Jan102011

Peanut Butter Cream Pie with Chocolate Whipped Cream, Caramel, and Deep Dark Fudge (via Evil Shenanigans) | Pie Month


This is the 4th entry in our Month of Pie. Pie Month is a celebration of things we love. Because life is hard, and there should always be more pie. Have a look at the other entries. Really. 
Let’s cut the preamble/heart-touching story/soul searching intro...


Make this pie. Make it now. Get out your shopping list and go to the store and do not stop baking, stirring, and whisking until you can shove this pie in your mouth.


This is pie that makes you jump up and down. This is pie that makes start texting the neighbors that you have pie tonight to share. This is pie for the ages. 


[If you’re allergic to peanuts or dairy, move along. Nothing to see here.]


This pie knows exactly what its job is...to punch you in the face with its awesomeness. To demand respect for its creamy peanut butter center and fluffy “that’s so good, it almost taste like ice cream” topping. To lightly tickle your tongue with the crunch of graham crackers mixed with the addition of deep fudge and sweet, deep caramel. To be as light as air that not having a second piece would be considered ridiculous, if not downright offensive.


This is pie. Dammit.


The brilliance behind this pie for the ages is Kelly at Evil Shenanigans. I’m pleased to call her our friend, if we’ve only ever met on Twitter and Skype. Kelly is just one of the best things going on a food blog. Smart advice, great recipes, and chock full of funny. And she’s got herself a brand-new book deal, which is so richly deserved. Especially considering this pie.


Here’s what we did to Kelly’s pie, with her blessing, to make it our own.
  • We made a caramel sauce and added a thin layer right on top of the crust after it had cooled. Not even ¼ of a cup. 
  • We added a touch (a lot) of caramel to the top of the pie as we served it.
  • And we had some deep dark fudge sauce lying around (as one should), and added a bit of that on top. Just make sure the fudge and caramel aren't hot when you add them to the whipped cream topping (you will melt it and have a big pool of sad).
This is pie, friends. This is pie.


recipe | Peanut Butter Cream Pie with Chocolate Whipped Cream (via Evil Shenanigans) 
Make your own caramel and fudge sauce. Or buy some. We're not judging.